- Rated ( votes)
- 6,460 views
-
- Stronghold Legends Mission Walkthrough
- 5 mins


We're finally here - the very last mission in The Road to Hell! As soon as the map begins, you should immediately recognise it as a familiar map from the Custom Skirmish menu — The Snake. But of course, being a trail map, it does have a few minor changes in terms of building and troop placement. First off, where you start the map you will notice a small Skirmish taking place between a single Knight of yours and several enemy Swordsmen. To save your Knight, immediately pull him away from it but keep him nearby - try to attack the lone Swordsmen who will attempt to attack your Granary whilst taking as little damage as possible. Move your Archers from your Keep towards the Skirmish and try to do as much damage as possible. You will receive reinforcements of two Knights, Merlin, and several Pictish Boat Warriors. You can also use Arthur to attack them. Save as many boat warriors as possible as they are the key to your next move. You will hopefully win this Skirmish with very few, if any, casualties.
Once again, we're faced with Vlad, an opponent who will cause considerable damage unless you take him out fast. And luckily, not only is he in a position that would make things extremely difficult for you anyway, but you also have the resources to attack him already. Purchase any lost horses again for your Knights then send all your ground troops to capture the estate before Vlad's wall. Next, send your Pictish Boat Warriors to capture Vlad's gatehouse. With probably only 1 or 2 archers present, you will easily overwhelm it. 
While they're moving towards it, place a Wood Camp, Stone Quarry and Dairy Farm. Once you're inside the Castle you will have to act fast. Race up to his Keep, and activate Arthur's special power to produce several Knights. Swarm the Keep with everything you have and take Vlad out. It will be a brutal melee, but even though Vlad summons his own Werewolves you should win. That's Vlad down - time to quickly place a basic defence against Siegfried! Build a wall on the far-side of your estate and place a Barracks and Armoury. Purchase as many bows as you possibly can, and then recruit all Archers, stationing them on your wall. Send all your troops over to your newly built wall. Providing you can reach around 50 Archers you should be fine - the first Siege only contains a small number of Shield Maidens and Archers anyway.
You should also start building up an economy now, so place two Iron Mines and an Ox Tether, then start placing a few Wood Camps and more Food Production buildings. You will start to face increasing attacks from both Siegfried and Arthur, so I'd advise you to take all estates you can in order to get a constant supply of resources. You can sell these and purchase bows instead. Recruit Archers and keep them on your wall. 
Tip: Unless your wall is fully destroyed in at least 1 section, the only attacks you will ever experience will be Sieges. To help rebuild your wall during times of Siege, place an Engineer's Guild and recruit several Engineers.
Next start focussing on Honour buildings - place a Pantry, Pig Farm and several other varied buildings, such as Vineyards and Vegetable Gardens. Continue using the pattern you have been using of selling anything in your Stockpile in order to recruit more Archers. Once you get to around 80 Archers, switch to Crossbowmen instead. Crossbowmen are much more effective at killing Frost Giants, which will cause a serious issue for you unless you very quickly manage to get a large number of crossbowmen. Keep building up your force using this tactic, and replace your walls with lookout towers wherever possible.
Once you're able to defend yourself, recruit Sir Bedivere from the Round table, and once the sieging comes to a brief pause, send him to use his 'Horn of Camelot' power to destroy the first wall of Arthur's. It won't be rebuilt anytime soon. Send him immediately back to your castle for safety. Once his power has been restored, recruit around 80-100 men-at-arms, and send them to dig the moat. Now use the same tactic and destroy the second wall. You might find that not even these numbers of Men-at-arms is enough, or you may unfortunately get hit by a wave of attacks from either Siegfried or Arthur - in this case do what damage you can, particularly to the wall, and return when you next find a suitable gap in invasion forces. You may also wish to purchase a Dragon in order to kill off the Archers which attack you from on top of the Barracks. 
Once you're through the second wall, send all your troops through the gap and charge straight to the Keep. Use your Lord's special power to summon a group of knights on top of the Keep. This will trigger Arthur to trigger his special power, and then use Percival's power to throw his troops from the Keep. Storm the Keep with all your other troops, and then kill Arthur!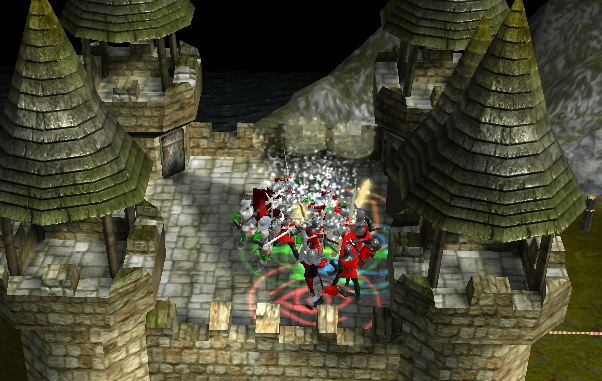
Now Arthur is killed, send all your troops up on top of the Keep of the estate. They can't be attacked by Frost Giants this way, and will prevent your new estate from being captured. Purchase a new dragon, and focus on your defence until it is ready. At this point, attack Siegfried directly in his Keep - you should very easily overwhelm him with a single Dragon, Mission complete! Congratulations on completing all the Skirmish Trails in Stronghold Legends! 
You can download the final saved game of The Road to Hell in our downloads section, available here.